

In this journal entry, I want to give you a step by step on how you can set up your handbuilding studio at home. This entry is not about glazing or firing. These topics will be covered separately. Before I get into the steps, let me give you two reasons why I recommend this, especially to a beginner.
Reason #1: Handbuilding requires a minimal setup but has limitless possibilities. Limitless how? Because you can make anything, ANYTHING, with handbuilding.
Reason #2: It’s Economical. You need less clay due to less wastage, you don’t need a recycling setup because of that. The number of specialised tools you decide to buy are at your own discretion. You could work for a year with the most basic pottery kit and ‘jugaado’ some extra tools here and there. This post is relevant to people who want to learn ceramics as a serious hobby but have limited time, or people who’re interested in getting into pottery as a career, but don’t know where to begin. Well, this is the perfect starting point for you.
Without further ado, let’s proceed to the 7 steps to setting up your Handbuilding Workspace.
Step 1: Dedicated Table and Ergonomic Stool
Getting a “dedicated” table was a game changer for me back when I was a hobby potter. You have to get these custom made to your requirement. You can get the table made with a good quality ply or better yet, with any wood (solid/engineered). Remember, do not get the top usable surface polished. You can polish the legs of the table. The table length and breadth can be as per the space available to you. Decide the height carefully. Ideally, the table top should come upto where your legs begin. You will use this table to wedge the clay and also where you do your handbuilding projects. Buy a comfortable stool, ideally with adjustable height and a little cushioning in the seat to make your long hours comfortable. This set will be your biggest purchase in the setup.
Step 2: Banding Wheel
I cannot recommend this enough! A banding wheel is a heavy manually rotating wheel. You can prop your work on top of this. It brings your piece closer to your eye level and also gives you easier access to all angles. Sometimes I see budding potters buy plastic banding wheels used for cakes as an alternative to an actual metal banding wheel. So this is something you could do if you’re unwilling to spend Rs.4-7K on a banding wheel. Just remember, you can work smaller, lighter pieces on a plastic cake stand, but not larger heavier pieces.
Step 3: Clay
If you’re a beginner, you should choose between Earthenware clay and Stoneware clay in the beginning. The third type of clay, that is, porcelain, is difficult to work with even for experienced potters. Hence not recommended in the beginning. Most commonly available earthenware clay in India is terracotta, which fires mostly to an earthy red. Earthen ware is relatively easier to use than stoneware. Terracotta is mostly not glazed, and most potters may not stock terracotta compatible glazes. Stoneware can be dark or light body. Mostly glazed and most studio potters will have a stock of compatible stoneware glazes if you’d like to get your piece glazed at a later date.
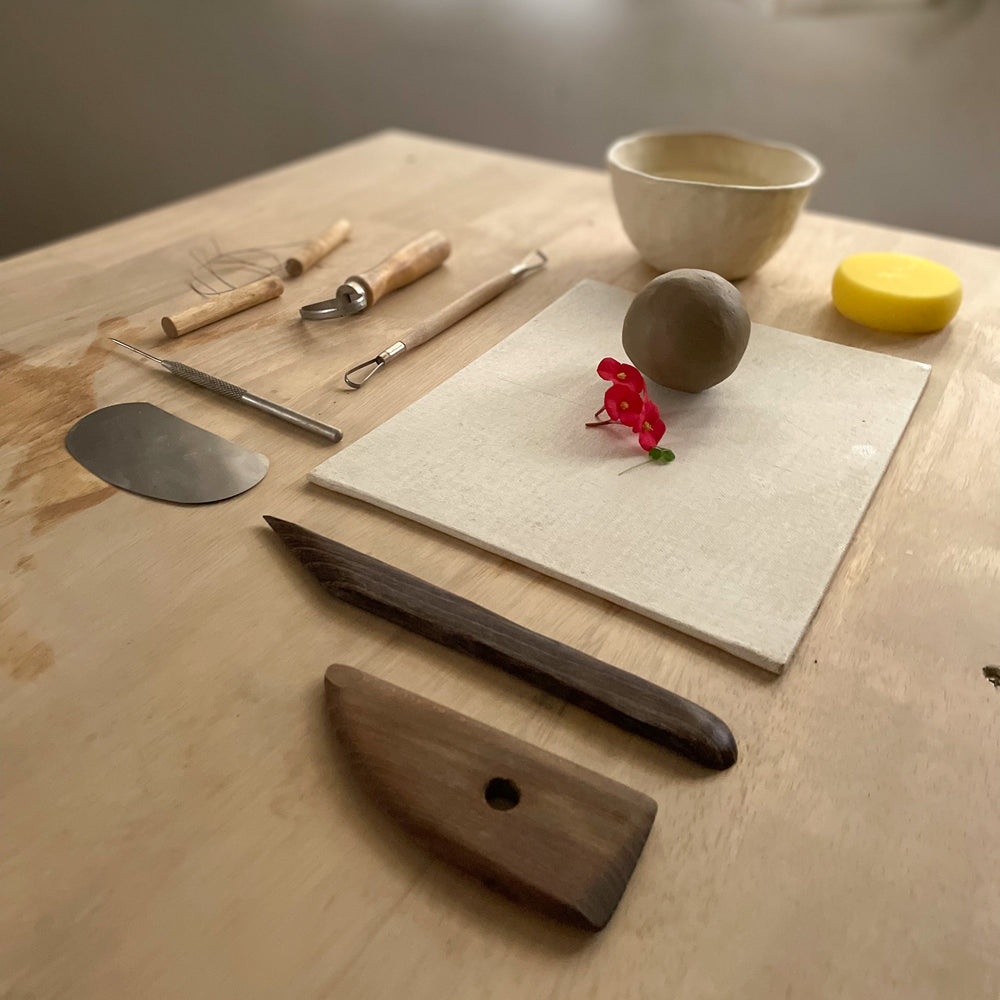
Step 4: Pottery Tool Sets and accessories
Apart from the first three points, the remaining are optional. You should keep adding to your tools collection as and when need arises.
- Basic Pottery 8-piece pottery tool set which typically had a sponge, needle, scraper, wire tool, 2 trimming tools and 2 wooden tools. If you’re feeling like splurging on this, you can look for Mont Marte or Mudtools sets. This set is very versatile and can be used for hand building as well as wheel throwing.
- Cylindrical Rolling pin and guide sticks for rolling slabs.
- A spray bottle - very useful in keeping clay in plastic or leather hard stage.
- A potter’s/crafter’s blade or knife. Mont Marte sells a set of these.
- Embossing tool set, also known as ball styluses for carving.
- An apron, ideally a split apron made of canvas, if it’s available.
- A large piece of sponge as a rest for your delicate pieces
- Basic paint brushes to use for slip application
Step 5: Clay Storage and Organizers
You can store soft, plastic clay in a lidded bucket. Ensure that the lid of the bucket is always closed. Maintain a film of moisture inside the bucket using the spray bottle. Organizers for your tools. A couple of bowls for water. A lidded jar to store slip.
Step 6: Weighing Scale
This is completely optional. You can pick an analog or a digital scale. You need the scale to weigh clay balls which will mostly be unnecessary in the beginning.
Step 7: Canvas Board
A canvas board. This will be used for wedging and as the surface where you dry your clay if it’s too soft.
Do post your queries and comments in the Comments section below. Wish you all the best in setting up your handbuilding space!